| SUSE LINUX – Administration Guide Chapter 22. Linux in the Network / 22.12. Time Synchronization with xntp | ||||
|---|---|---|---|---|
 | 22.11. DHCP | Chapter 23. The Apache Web Server |  | |
| SUSE LINUX – Administration Guide Chapter 22. Linux in the Network / 22.12. Time Synchronization with xntp | ||||
|---|---|---|---|---|
| 22.11. DHCP | Chapter 23. The Apache Web Server | | |
The exact time plays an important role in many processes in a computer system. For this purpose, computers usually have a built-in clock. Unfortunately, these clocks often do not meet the requirements of applications like databases. Therefore, the local clock must regularly be corrected manually or over a network. In the best case, the computer clock should never be set back and the amount by which it is set forward should not exceed certain time intervals.
The computer clock can easily be corrected with ntpdate from time to time. However, this causes a sudden time difference that may not be tolerated by all applications.
xntp provides an interesting approach for solving this problems. First, xntp regularly corrects the local computer clock on the basis of collected correction data. Second, it continuously corrects the local time with the help of time servers in the network. Third, it enables the management of local reference clocks, such as radio-controlled clocks.
xntp is preset to use the local computer clock as a time reference. The easiest way to use a time server in the network is to set server parameters. For example, if a time server called ntp.example.com is available in the network, add this server to the file /etc/ntp.conf in the form server ntp.example.com.
To add more time servers, insert additional lines with the keyword server. After initializing xntpd with the command rcxntpd start, it takes one hour until the time is stabilized and the drift file for correcting the local computer clock is created. In the long run, the advantage of the drift file is that the drift of the hardware clock can be projected as soon as the computer is powered on. The correction is activated immediately, resulting in a high stability of the computer time.
If the time server in your network can be reached via broadcast, you do not need the server name. In this case, enter the command broadcastclient in the configuration file /etc/ntp.conf. To avoid an incorrect time server in the network from changing the computer time, set up the authentication mechanisms.
Normally, every xntpd in the network can also be addressed as a time server. To run xntpd with broadcasts, configure the broadcast option:
broadcast 192.168.0.255
Adjust the broadcast address to your circumstances. Make sure the time server uses the correct time. This can be done with reference clocks.
The software package xntp contains drivers for connecting local reference clocks. A list of supported clocks is available in the xntp-doc package in the file /usr/share/doc/packages/xntp-doc/html/refclock.htm. Every driver is associated with a number. In xntp, the actual configuration takes place by means of pseudo IPs. The clocks are entered in the file /etc/ntp.conf as though they existed in the network. For this purpose, they are assigned special IP addresses in the form 127.127.t.u. Refer to the above-mentioned file containing the list of reference clocks to get the value for t. u is the device number that is only higher than 0 if you use several clocks of the same type on the computer. For example, a “Type 8 Generic Reference Driver (PARSE)” has the pseudo IP address 127.127.8.0.
Normally, the individual drivers have special parameters that describe configuration details. The file /usr/share/doc/packages/xntp-doc/html/refclock.htm provides links to the driver pages describing these parameters. For example, the “Type 8” clock requires an additional mode that specifies the clock more precisely. The Conrad DCF77 receiver module, for example, has mode 5. To make xntp accept this clock as a reference, specify the keyword prefer. The complete server line for a Conrad DCF77 receiver module would be:
server 127.127.8.0 mode 5 prefer
Other clocks follow the same pattern. Following the installation of the xntp-doc package, the documentation for xntp is available in the directory /usr/share/doc/packages/xntp-doc/html.
As well as this manual configuration of xntp, SUSE LINUX facilitates the configuration of an NTP client with YaST. Use the easy quick configuration or complex configuration. Both are described in the following.
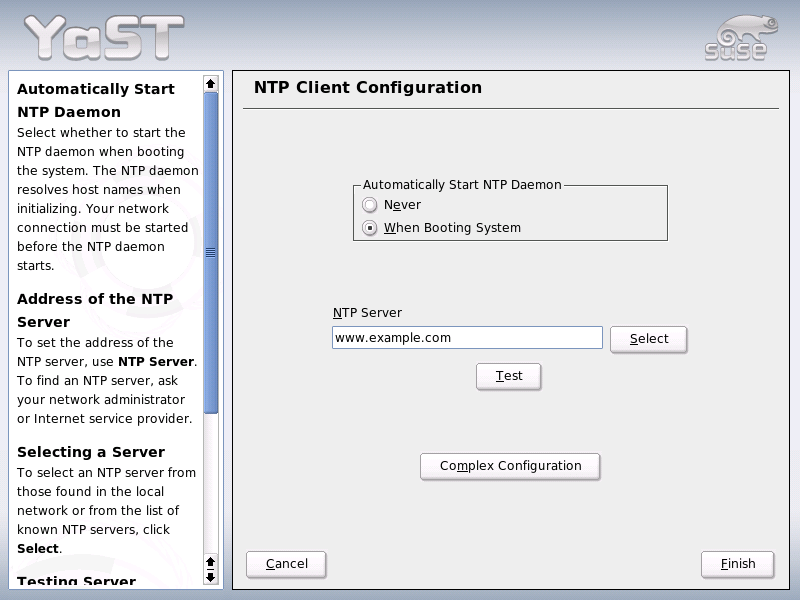
The easy NTP client configuration comprises two dialogs. Set the start mode of xntpd and the server to query in the first dialog. To start xntpd automatically when the system is booted, click . Then click to access a second dialog in which to select a suitable time server for your network.
In the detailed server selection dialog, determine whether to implement time synchronization using a time server from your local network or an Internet-based time server that takes care of your time zone (). For a local time server, click to start an SLP query for available time servers in your network. Select the most suitable time server from the list of search results and exit the dialog with . For a public time server, select your country (time zone) and a suitable server from the list under Public NTP Server then exit the dialog with . In the main dialog, test the availability of the selected server with and quit the dialog with .
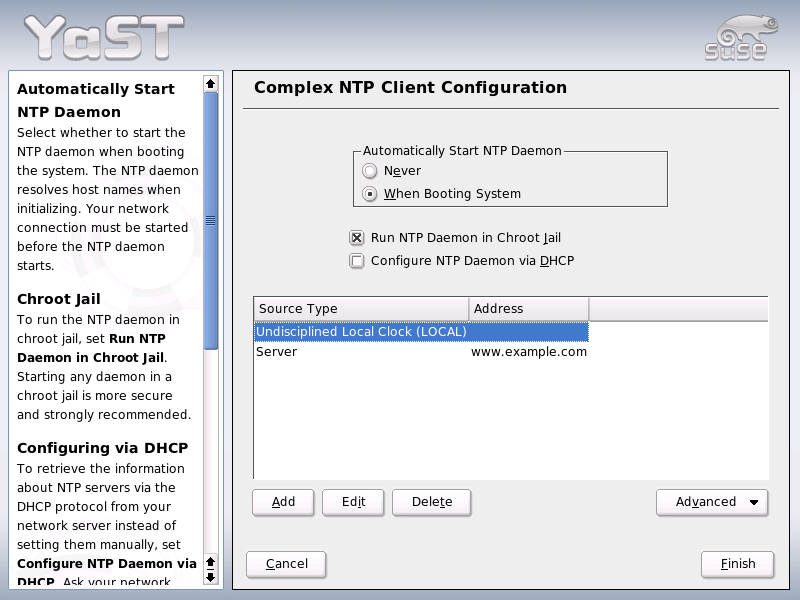
The complex configuration of an NTP client can be accessed under from the main dialog of the module, shown in Figure 22.34. “YaST: Configuring an NTP Client”, after selecting the start-up mode as described in the quick configuration.
In , determine whether xntpd should be started in a chroot jail. This increases the security in the event of an attack over xntpd, because it prevents the attacker from compromising the entire system. Configure NTP Daemon via DHCP sets up the NTP client to get a list of the NTP servers available in your network via DHCP.
The servers and other time sources for the client to query are listed in the lower part. Modify this list as needed with , , and . provides the possibility to view the log files of your client or tune the firewall to the NTP client configuration.
Click to add a new source of time information. In the following dialog, select the type of source with which the time synchronization should be made. The following options are available:
Another dialog enables you to select an NTP server (as described in 22.12.3.1. “Quick NTP Client Configuration”). Activate Use for Initial Synchronization to trigger the synchronization of the time information between the server and the client when the system is booted. An input field allows you to specify additional options for xntpd. Refer to /usr/share/doc/packages/xntp-doc for more information.
To use a peer in the same network instead of a server, enter the address of the respective system. The rest of the dialog is the same as the dialog for Server.
To use a radio clock in your system for the time synchronization, enter the clock type, unit number, device name, and other options in this dialog. Click to fine-tune the driver. Detailed information about the operation of a local radio clock is available in file:///usr/share/doc/packages/xntp-doc/html/refclock.htm.
Time information and queries can also be transmitted via broadcast in the network. In this dialog, enter the address to which such broadcasts should be sent. Additional options can be configured as described in /usr/share/doc/packages/xntp-doc.
If you want your client to receive its information via broadcast, enter the address from which the respective packets should be accepted in this fields. Further options are described in /usr/share/doc/packages/xntp-doc.